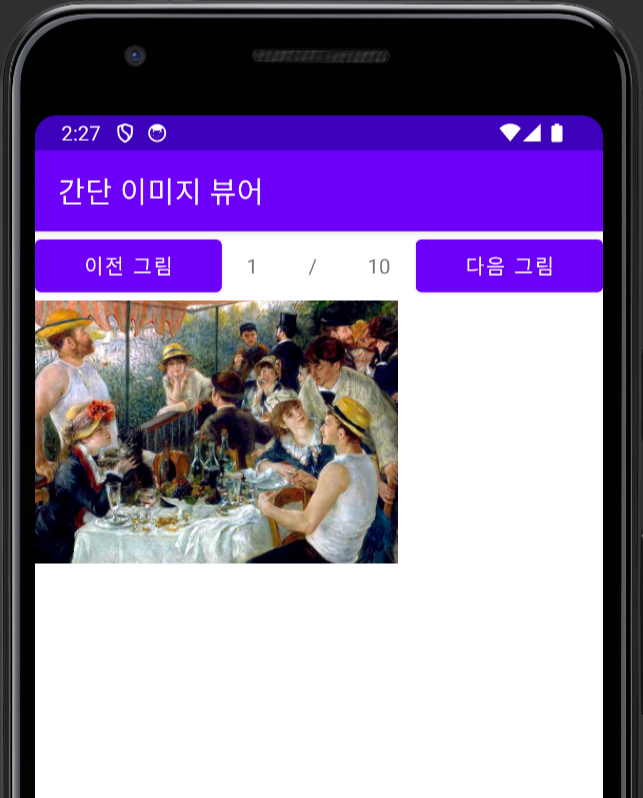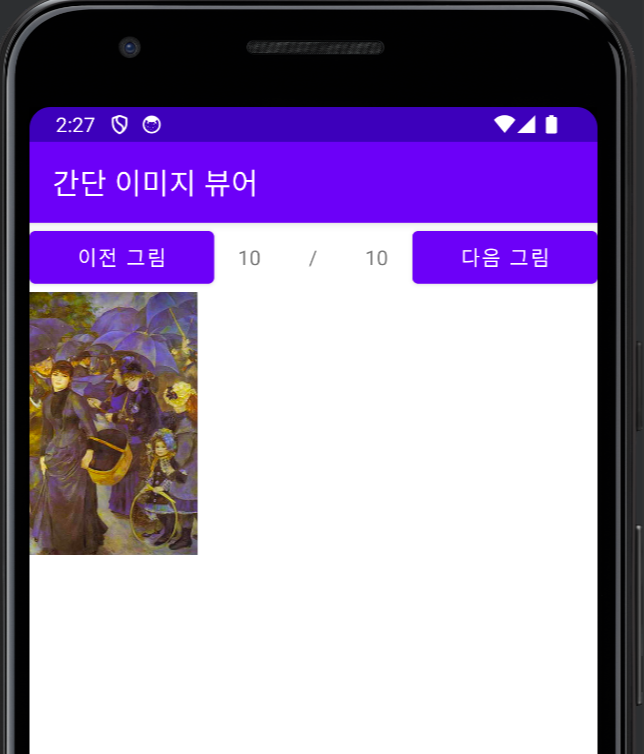
🚀 SD 카드 특정 폴더의 이미지 파일을 보여주는 간단한 이미지 뷰어 앱 만들기
1. 화면 디자인 및 편집
1) MyPictureView 클래스
커스텀 위젯 (Custom Widget, Custom View)을 직접 만들어서 activity_main.xml에 넣어서 사용.
➡️ 커스텀 위젯은 지정된 이미지 파일을 출력하는 역할
MyPictureView.kt
✓ onDraw() 메서드를 오버라이딩
class MyPictureView(context: Context, attrs: AttributeSet?) : View(context, attrs) {

    var imagePath : String? = null

    @SuppressLint("DrawAllocation")
    override fun onDraw(canvas: Canvas) {
        super.onDraw(canvas)
        try {
            if (imagePath != null) {
                val bitmap = BitmapFactory.decodeFile(imagePath)
                canvas.scale(2f, 2f, 0f, 0f)
                canvas.drawBitmap(bitmap!!, 0f, 0f, null)
                bitmap.recycle()
            }
        } catch ( e : Exception) {

        }
    }
}
var imagePath : String? = null
✓ 이미지 파일의 경로 및 파일 이름을 저장할 변수
if (imagePath != null) {
val bitmap = BitmapFactory.decodeFile(imagePath)
canvas.scale(2f, 2f, 0f, 0f)
canvas.drawBitmap(bitmap!!, 0f, 0f, null)
bitmap.recycle()
}
✓ imagePath에 값이 있으면(경로 및 파일이름이 지정되었다면) 화면에 그림 파일을 출력
2) activity_main.xml
- 가로 레이아웃에 버튼 2개를 생성
- 커스텀 위젯인 MyPictureView를 생성
- 위젯의 이름은 btnPrev, btnNext, myPictureView
<LinearLayout xmlns:android="http://schemas.android.com/apk/res/android"
    xmlns:app="http://schemas.android.com/apk/res-auto"
    xmlns:tools="http://schemas.android.com/tools"
    android:layout_width="match_parent"
    android:layout_height="match_parent"
    tools:context=".MainActivity"
    android:orientation="vertical">

    <LinearLayout
        android:layout_width="match_parent"
        android:layout_height="wrap_content"
        android:orientation="horizontal" >

        <Button
            android:id="@+id/btnPrev"
            android:layout_width="wrap_content"
            android:layout_height="wrap_content"
            android:layout_weight="1"
            android:text="이전 그림" />

        <Button
            android:id="@+id/btnNext"
            android:layout_width="wrap_content"
            android:layout_height="wrap_content"
            android:layout_weight="1"
            android:text="다음 그림" />

    </LinearLayout>

    <kr.abc.stream_practice.MyPictureView
        android:id="@+id/myPictureView"
        android:layout_width="wrap_content"
        android:layout_height="wrap_content" />

</LinearLayout>
👾 /storage/emulated/0/Pictures 에 이미지 업로드 후 AndroidManifest.xml 에 권한 설정
 <uses-permission android:name="android.permission.WRITE_EXTERNAL_STORAGE" />
    <application
        android:requestLegacyExternalStorage="true"
2. kotlin 코드 작성 및 수정
class MainActivity : AppCompatActivity() {
    // 전역변수 선언
    lateinit var btnPrev: Button
    lateinit var btnNext: Button
    lateinit var myPicture: MyPictureView

    var curIndex: Int = 1 // 이미지 파일의 인덱스로 사용할 변수
    var imageFiles: Array<File>? = null // SD 카드에서 읽어올 이미지 파일의 배열

    override fun onCreate(savedInstanceState: Bundle?) {
        super.onCreate(savedInstanceState)
        setContentView(R.layout.activity_main)

        title = "간단 이미지 뷰어"

        // 접근 권한 요청
        ActivityCompat.requestPermissions(
            this,
            arrayOf(android.Manifest.permission.WRITE_EXTERNAL_STORAGE),
            Context.MODE_PRIVATE
        )

        btnPrev = findViewById(R.id.btnPrev)
        btnNext = findViewById(R.id.btnNext)
        myPicture = findViewById(R.id.myPictureView)

        imageFiles =
            File(Environment.getExternalStorageDirectory().absolutePath + "/Pictures").listFiles()

        // 파일 목록 출력
        for (i in imageFiles!!.indices) {
            var fileName = if (imageFiles!![i].isDirectory == true)
                "<폴더> " + imageFiles!![i].toString()
            else
                "<파일> " + imageFiles!![i].toString()
            println(fileName)
        }

        // 첫 번째 파일을 커스텀 위젯에 출력
        // 해당 인덱스의 이미지 파일 이름을 myPicture에 전달한다는 뜻
        myPicture.imagePath = imageFiles!![curIndex].toString()

        btnPrev.setOnClickListener {
            if (curIndex <= 1) {
                Toast.makeText(applicationContext, "첫번째 그림입니다", Toast.LENGTH_SHORT).show()
            } else {
                myPicture.imagePath = imageFiles!![--curIndex].toString()
                myPicture.invalidate()
            }
        }

        btnNext.setOnClickListener {
            if (curIndex >= imageFiles!!.size-1) {
                Toast.makeText(applicationContext, "마지막 그림입니다.", Toast.LENGTH_SHORT).show()
            } else {
                myPicture.imagePath = imageFiles!![++curIndex].toString()
                myPicture.invalidate()
            }
        }
    }
}


첫 번째 이미지에서 이전 버튼을 누르면 마지막 이미지가 뜨거나,
마지막 이미지에서 다음 버튼을 누르면 첫 번째 이미지가 뜨게 하기
class MainActivity : AppCompatActivity() {
    lateinit var btnPrev: Button
    lateinit var btnNext: Button
    lateinit var textIndex: TextView
    lateinit var textTotal: TextView
    lateinit var myPicture: MyPictureView
    var curIndex: Int = 1
    var imageFiles: Array<File>? = null

    override fun onCreate(savedInstanceState: Bundle?) {
        super.onCreate(savedInstanceState)
        setContentView(R.layout.activity_main)

        title = "간단 이미지 뷰어"
        ActivityCompat.requestPermissions(
            this,
            arrayOf(android.Manifest.permission.WRITE_EXTERNAL_STORAGE),
            Context.MODE_PRIVATE
        )

        btnPrev = findViewById(R.id.btnPrev)
        btnNext = findViewById(R.id.btnNext)

        textIndex = findViewById(R.id.textIndex)
        textTotal = findViewById(R.id.textTotal)

        myPicture = findViewById(R.id.myPictureView)

        imageFiles =
            File(Environment.getExternalStorageDirectory().absolutePath + "/Pictures").listFiles()

        for (i in imageFiles!!.indices) {
            var fileName = if (imageFiles!![i].isDirectory == true)
                "<폴더> " + imageFiles!![i].toString()
            else
                "<파일> " + imageFiles!![i].toString()
            println(fileName)
        }

        myPicture.imagePath = imageFiles!![curIndex].toString()
        textTotal.text = (imageFiles!!.size-1).toString()
        textIndex.text = curIndex.toString()

        btnPrev.setOnClickListener {

            if (curIndex == 1) {
                curIndex = imageFiles!!.size
            } else {
                myPicture.imagePath = imageFiles!![--curIndex].toString()
                textIndex.text = curIndex.toString()
                myPicture.invalidate()
            }

        }

        btnNext.setOnClickListener {

            if (curIndex >= imageFiles!!.size-1) {
               curIndex = 0
            } else {
                myPicture.imagePath = imageFiles!![++curIndex].toString()
                textIndex.text = curIndex.toString()
                myPicture.invalidate()
            }

        }

    }
}


[ 내용 참고 : IT 학원 강의 ]
'Android Studio' 카테고리의 다른 글
| [Android Studio] 메뉴와 대화상자 | dialog (0) | 2024.05.05 |
|---|---|
| [Andorid Studio] 메뉴와 대화 상자 | option menu & context menu (0) | 2024.05.05 |
| [Android Studio] 간단한 일기장 external storage version (0) | 2024.05.03 |
| [Android Studio] 간단한 일기장 만들기 (0) | 2024.05.02 |
| [Android Studio] 파일 처리 응용 | SD카드 파일 읽기 · 파일 생성 · 목록 출력 (0) | 2024.05.02 |
